MakeMKV is one of my most used DVD and Bluray ripping tools. It’s not free, but you can get a 30-day free trial to give it a try. It won’t place a watermark on your ripped media either. So there’s no reason to not give it a try. This is my go-to software for ripping Bluray discs and is able to break much of the encryption that DVD Decrypter is unable to.
Its available on just about every operating system including Debian based Linux Operating Systems but it is a little more challenging to install it on those systems then it is on Windows or Apple. You can download from its website for Apple and Windows here. Linux users can get step by step instructions on how to install it here.
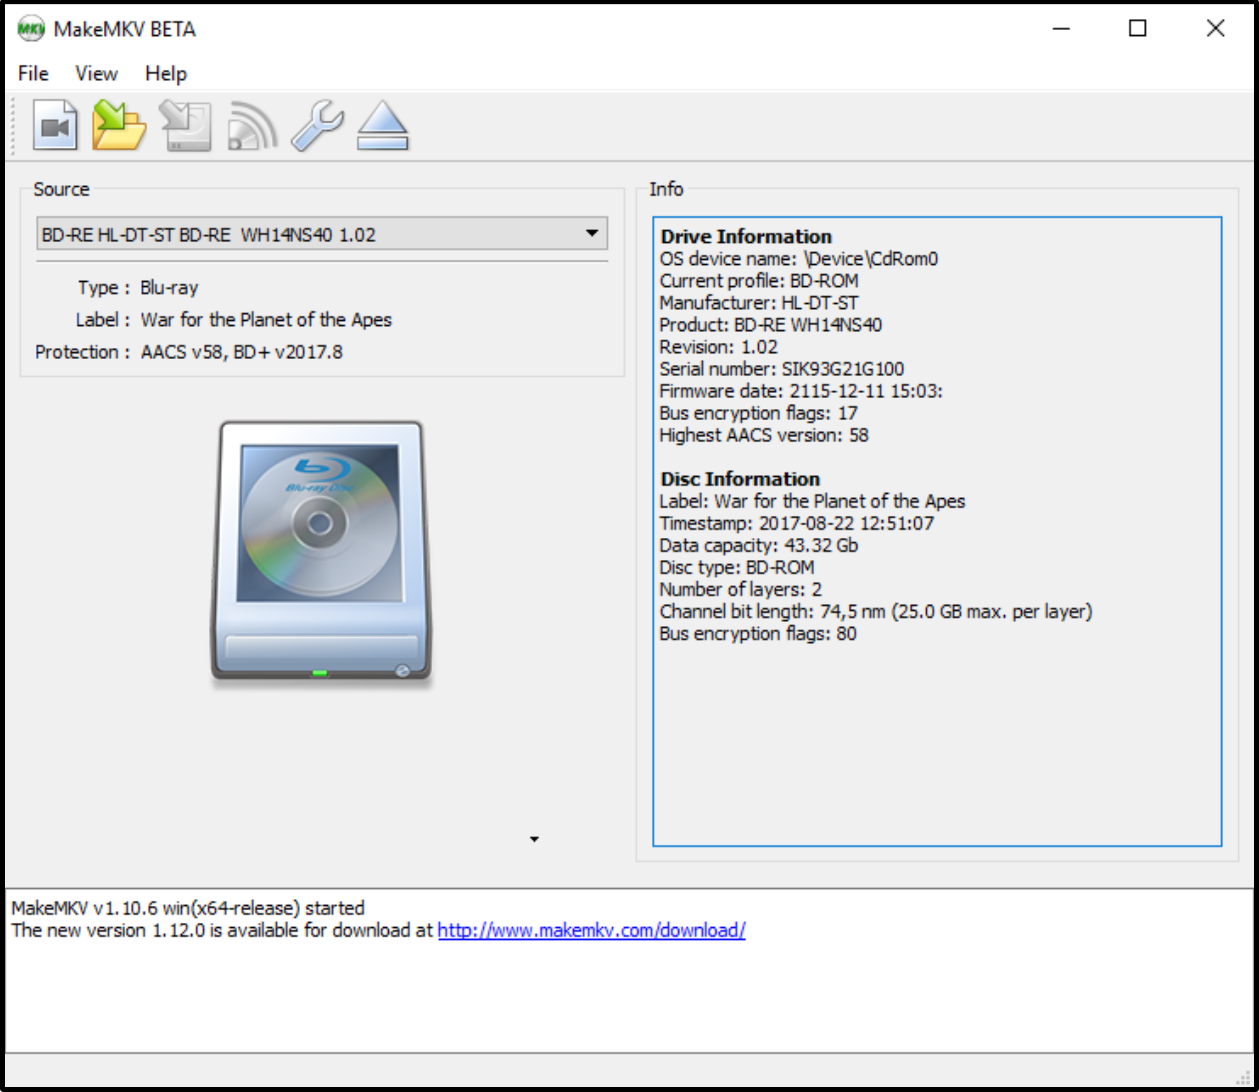
For this tutorial,c I’m going to use my War of the Planet of the Apes Bluray. The only major difference that you’ll see between ripping a DVD and a Bluray is that when ripping the Bluray the software is more likely to save the video using the title of the movie but a DVD will usually just have Title_01, Title_02 etc for the name of the movie requiring you to rename it before ripping another DVD.
Step 1
Once you open MakeMKV and install the Bluray the software will load the disc.
Step 2
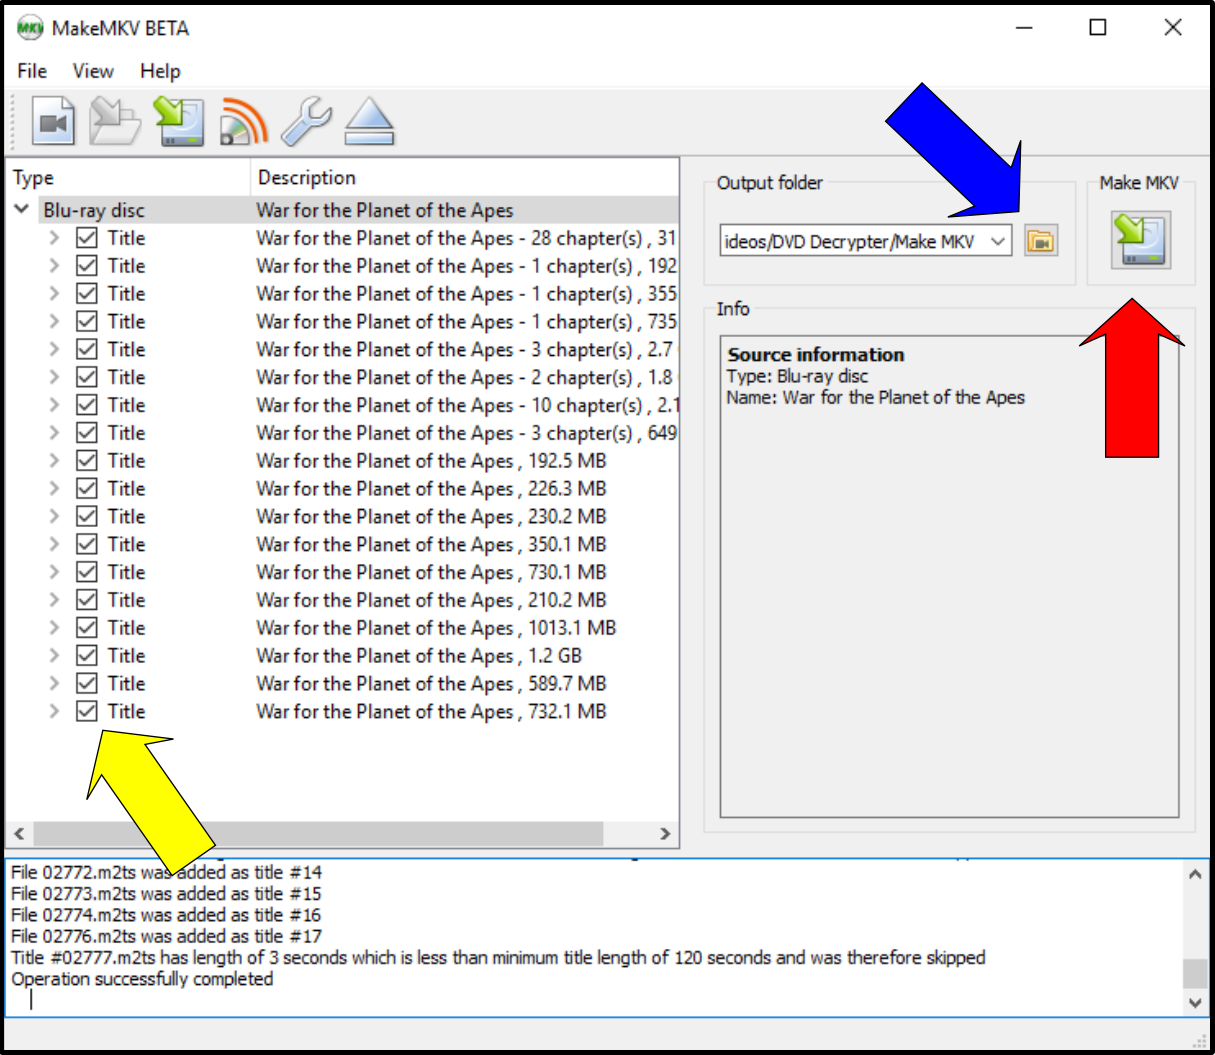
Click on the DVD player icon in the middle of the screen. The software then scans the disc to find out how many titles are on it as well as audio and subtitle tracks.
Step 3
Once the scan is complete you’ll see how many titles are on the disc. The Titles with the highest number of chapter and the largest in size are most likely the movie that you wish to rip. The software will check all of the titles by default. You can unselect all of them by placing your mouse over one of the boxes and doing a right click. A box will appear. Just select “Unselect all” and then click on the videos you wish to keep.
Step 4
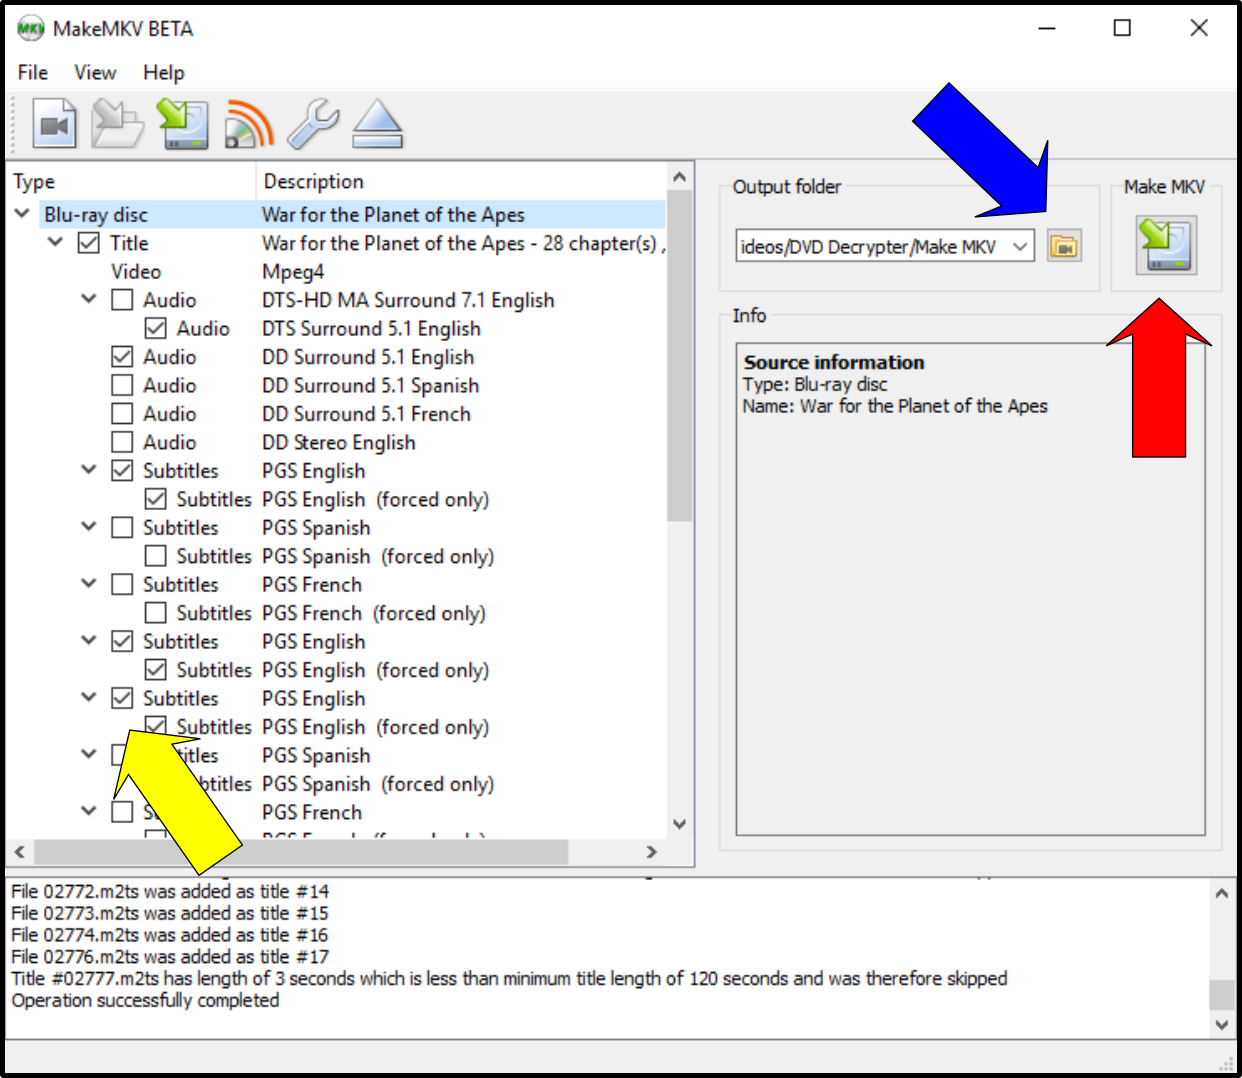
Expand the title you wish to rip and ensure that the audio and subtitle tracks are selected. You’ll want to check the subtitle’s in this section because movies will often contain subtitles now to show locations or when someone is speaking in a foreign language.
*note: Unlike a DVD rip and conversion with Handbrake where you select “Foreign Audio Scan” where ‘Forced Subtitles’ are used to translate foreign languages, Bluray discs will use a mildly different system. Screenshots showing examples at the end of the article.
To change the location of where to save the video, click on the file folder (Blue Arrow in Pic 3). You can also have a ‘default’ location saved in the in the setting (Wrench at top of the screen of Pic 3).
Step 5
Click on the MakeMKV DVD Player icon in the top right corner (Where the red arrow is pointing in Pic 4) and the movie will begin ripping.
Step 6 Let it rip
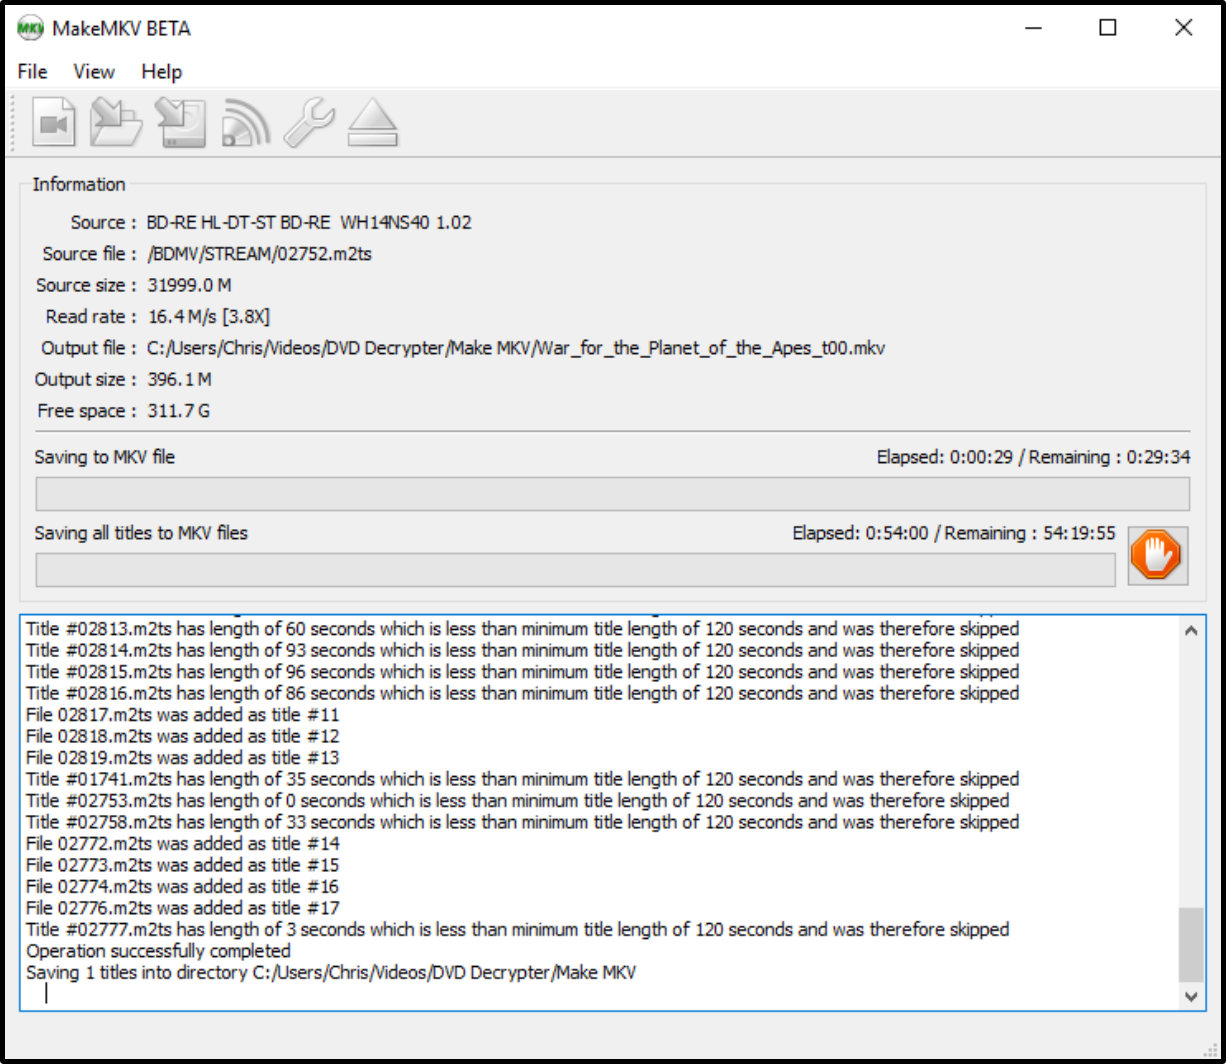
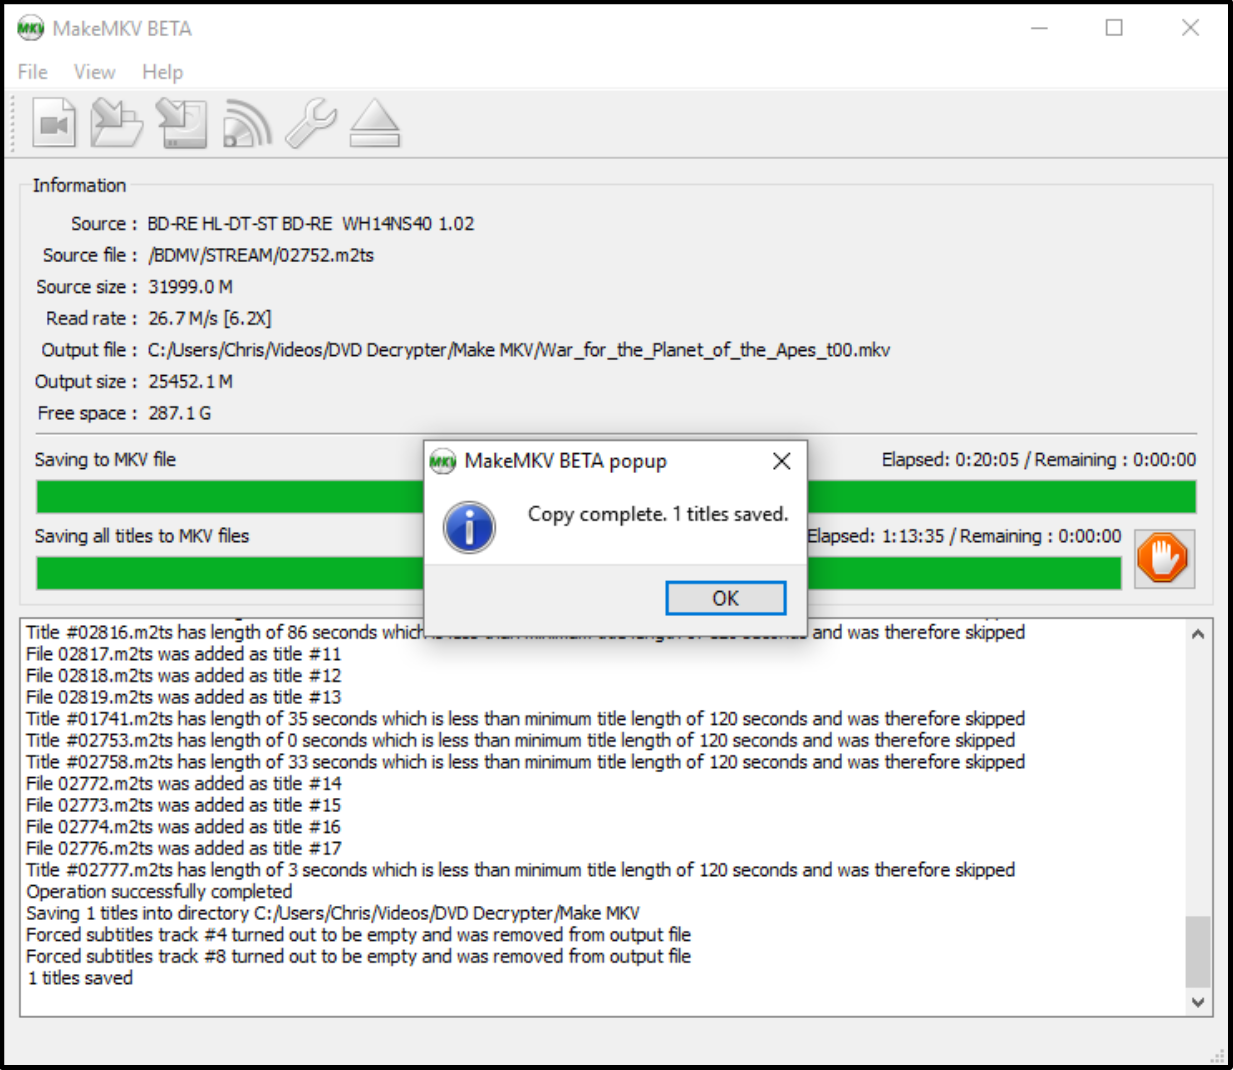
Step 7
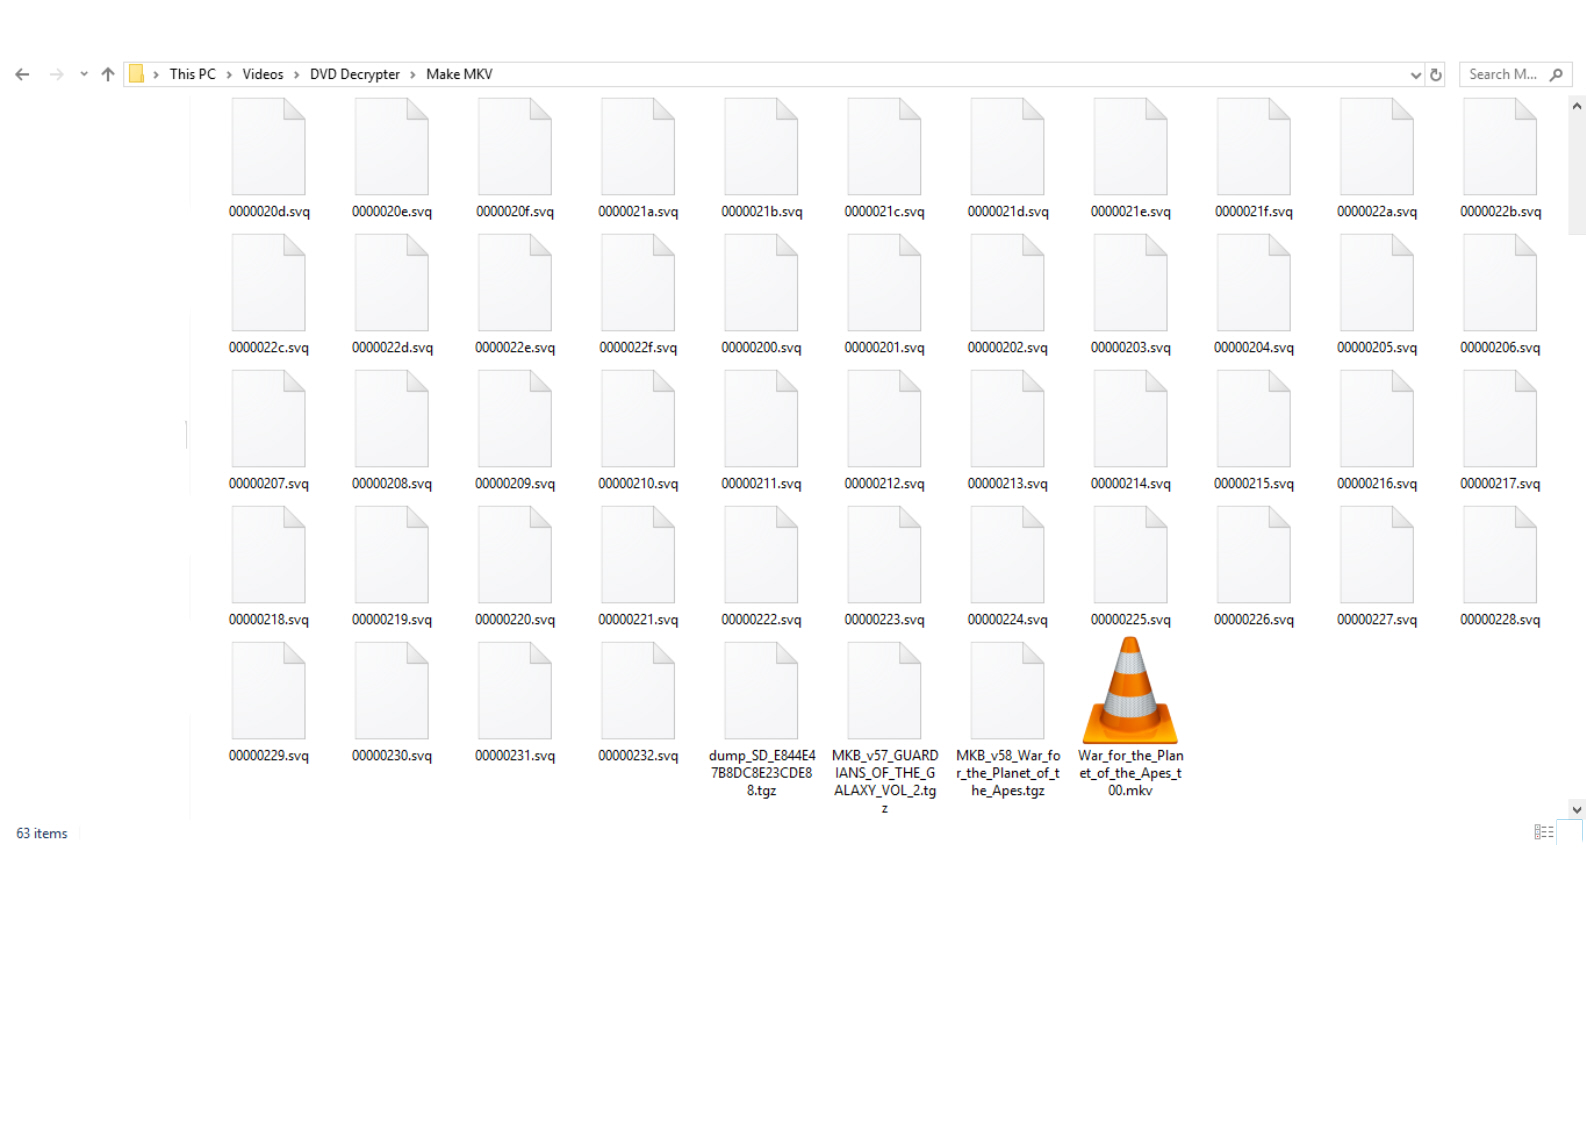
Once the video is finished being ripped, you’ll get a notification. Just click OK and you are done. When you open the file where the video was saved you’ll see several logs from when MakeMKV ripping process. You can just delete these.
Let it Rip
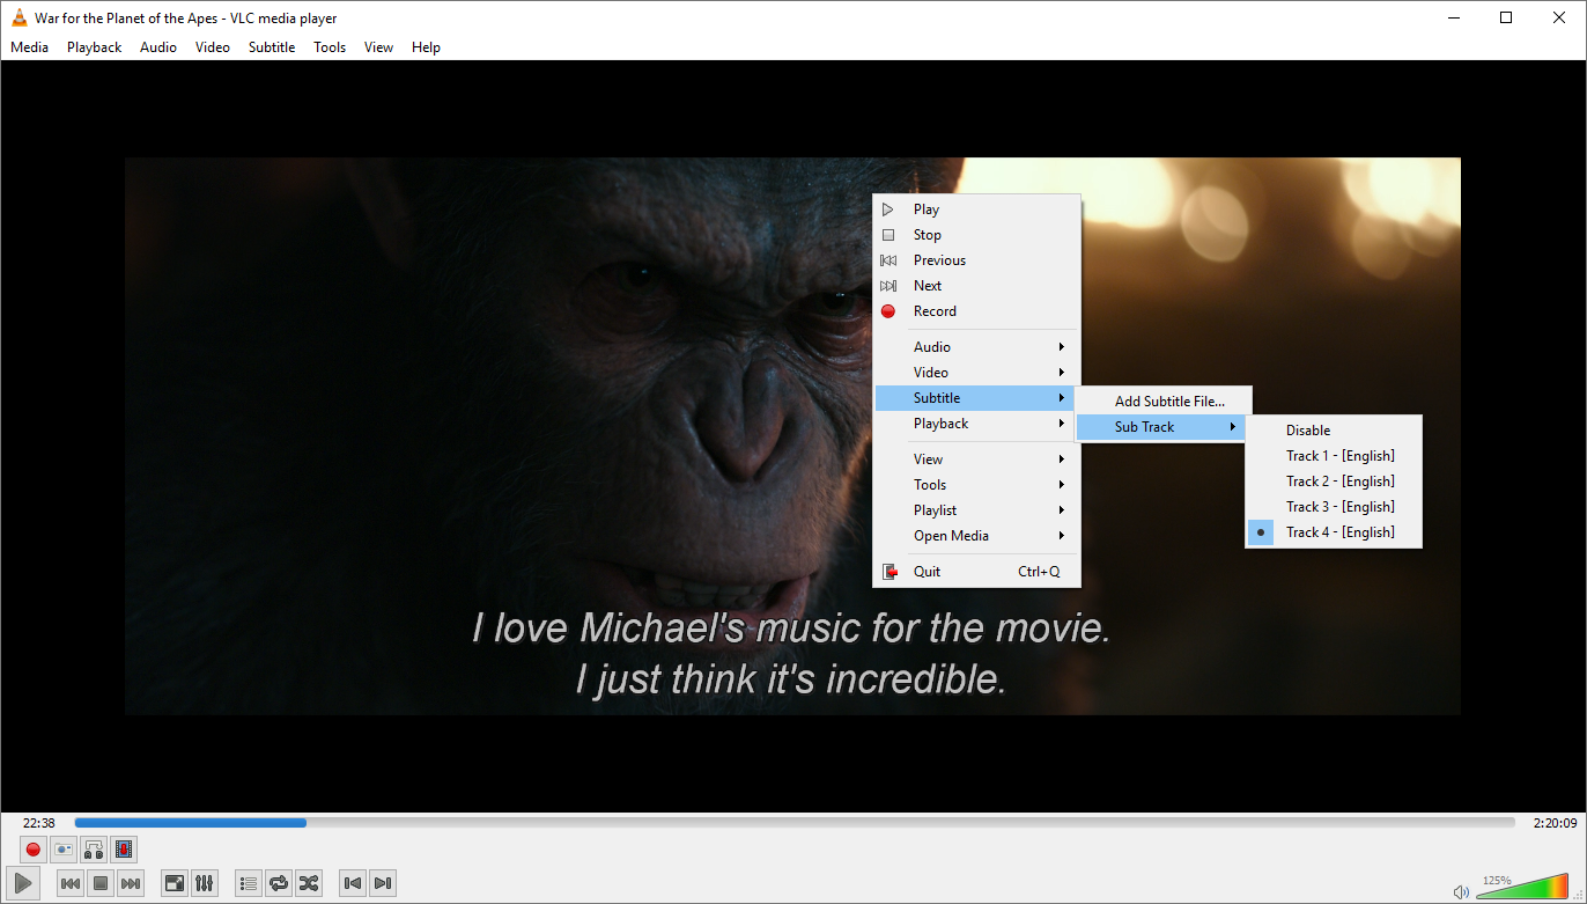
*Subtitles: Subtitles are becoming used more frequently in movies to give a sense of realism. For example in the rebooted Planet of the Apes series, most of the apes communicate via sign language. But Bluray and DVD’s handle subtitles differently. For a Bluray disc you’ll want to get all of the subtitles. In War of the Planet of the Apes you see that I have four different subtitles to choose from. As a general rule, the first subtitle is Subtitles for the deaf and hearing impaired, meaning that it will have not only the subtitles of the sign language, but the people talking in English as well as any noises or sounds that are relevant as well. Subtitle 2 are usually the ‘forced’ subtitles. These would be the subtitles for when someone is speaking in a foreign language, or in the case of this movie, the apes are using sign language. The remaining subtitle tracks are generally subtitles for commentary, but you should always ensure what they are.
If you are using Handbrake to convert or compress, you will want to find out which ‘subtitle track’ is the ‘forced subtitles’ and select it, then ‘burn’ them into the video rather then use the ‘Foreign Audio Scan’ option.