
How To Build A Budget Plex Server
Build a Plex Server
Build 1: Building on a budget
When I was growing up, the father of one of my friends built a working miniature Kenworth semi-truck. It served no real purpose other than to use in parades and shows, but it was really cool. Both of our fathers were truck drivers so a couple of times my dad and I would swing by his house and watch him work on it for a little while. The engine was V8 engine from a car as was the transmission, the wheels were from a Chevy pickup truck. The seats were actual semi-truck seats, but removed from the base and mounted directly onto the floor of the cab. It was a conventional design and when the driver sat in it he would actually be sitting in the sleeper with his feet right under the windshield. The windows were Plexiglas and the driver was actually looking out of the skylight in the sleeper berth. I’ll never forget the first time I saw the finished truck traveling down Main Street in our small towns sesquicentennial parade.
My buddy, Billy, was carefully operating it while his father, who was across the street from me, beamed with pride. Billy and I were well-known troublemakers growing up, he was beaming about the truck, not Billy…
When you build something with your own two hands it gives you a sense of accomplishment. It does not matter what it is, if it’s a product of your creation, you will always take pride in it. If you don’t believe me just go to a car show and talk to someone who built or restored a car to working order.
I bring this up to emphasize that I will never buy a computer again, and chances are that the first time that you build one you will understand why I say that.
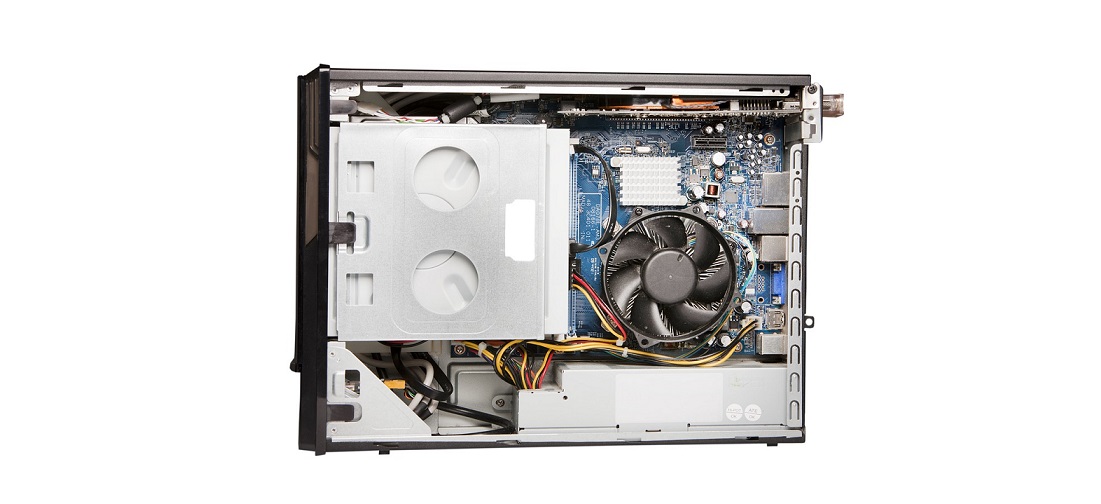
Listed below is a parts list for a very simple and easy budget build Plex or Network Attached Storage (NAS) system Server. This is intended to be a simple server that will stream videos to your devices as an alternative to using your main home PC. It should be capable of streaming two or three videos at a time. When you look at the requirements for Plex you’ll see that you can get by with pretty minimal hardware, a dual-core 1.6 GHz CPU will stream to your device and I’ve streamed as many as four devices with a dual-core 2.4 GHz CPU, but all of my videos are set up to run on my Roku devices without the need to transcode.
This parts list is intended to be a build which will allow you to stream to multiple Roku or Android devices in your home at the same time and a brief explanation why I picked them. I’m using the website “Passmark Software” (https://www.cpubenchmark.net/) as my guide, I’m also using the website “P.C. Parts Picker” (https://pcpartpicker.com/) to ensure that all of the items picked for this list are compatible with each other.
Budget Server Parts List
CPU: Intel Pentium G4400
I picked this CPU simply because it was the cheapest one at Newegg that met the requirements that I was looking 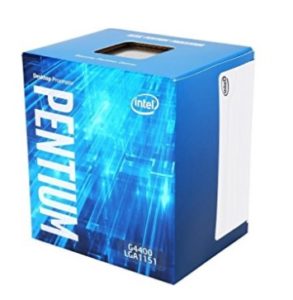 for. Dual core over 3 GHz. It’s Passmark is 3,579 ensuring that it will transcode at minimum one video at a time, but if you convert your videos to MP4 or MKV using h.264 encoding it will easily stream to several devices in your home. This CPU has been around for a long time establishing itself as a reliable. It’s a common CPU for the low-end computers you can purchase from the box stores.
Motherboard: Asus H110M-E/M.2 LGA1151
Again, I picked this Motherboard because it was the cheapest and also because it has a good reputation. Another benefit of this motherboard 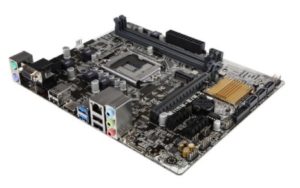 is that if you decide to install the Operating System on a SSD (Solid State Drive), this will support the M.2 Solid State Drive format making it even faster than the traditional SSD’s that conform to the Hard Drive bays. One added benefit is that if you ever decide that you want to increase the capabilities of your Plex Server, say you need to be able to transcode multiple streams, you can easily drop an i3, i5 or i7 series CPU in this motherboard. Place the right i5 or i7 CPU in this motherboard and you’ll have a computer capable of doing some heavy gaming or video editing.
Another feature of this motherboard is that it has enough SATA connectors for several hard drives, a big consideration for a Plex Server. In this build, I’m going to have three hard drives at 2 TB each.
RAM: G.SKILL NT Series
I picked this RAM for two reasons. First, I’ve been sold on G.Skill RAM. It’s been used in several computer builds 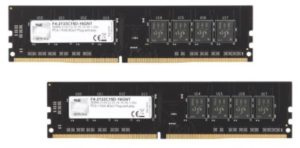 that I’ve been involved with and this is the cheapest RAM that G.Skill puts out. You’ll see that I got 8 GB of RAM in two 4 GB Sticks. A Plex server only needs to have 2 GB to run effectively but I usually go by the philosophy that I’d rather have too much and not need it then to have to little and regret it. But if you need to trim your budget, by all means, you can do it here. Personally, I wouldn’t go with this particular RAM and the reason is simply aesthetics, if I’m building something by hand, I’m going to put in something with a little more pizazz, perhaps with a dash of color to match the case I picked.
Storage: Toshiba P300 2TB Hard Drive (X3)
Storage is going to be your most important thing with a Plex Media Server, you’re going to find that you never have enough of it. I went with three 2 TB hard drives because this will allow me to configure my server in what is called a 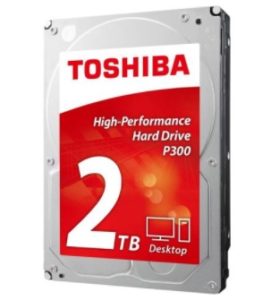 RAID array. RAID (Redundant Array of Independent Discs) is used for a variety of reasons, but having three discs of the same size permits me to ensure that if one of the Hard Drives fails, it can be replaced without losing any data. Most motherboards will allow you to configure a RAID array in the BIOS but most operating systems will also permit you to configure a RAID array and if you go with Windows 10 you can configure your discs in this way. This will give you about 4 TB of total storage. You may choose to just go with two hard drives and have a RAID 1 configuration, this will simply mirror your hard drive so that you have an exact copy of it.
Power Supply: EVGA 500 W1
This is probably the most crucial part of the build and if you talk to most computer builders you’ll find that they always suggest that this is where you don’t skimp out on budget. I picked particular power supply for two reasons.
Make: EVGA is a reputable manufacturer and they have a tradition of standing behind their equipment.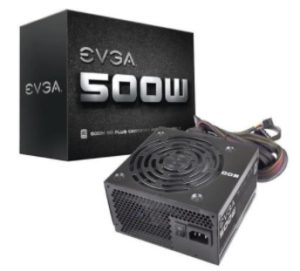
Power Rating – 500 Watts is more than enough power to run our build, which according to PC Part Picker only needs 179 Watts. So why so much power? Simple. Expansion. Plex has lots of capabilities and features and later you might decide to add a Digital TV Tuner card to your Plex Server, this will allow you to live stream over the air TV and DVR material to your server. It will also support a high-end graphics card if you ever need or want one. These things need power and this will give you adequate room in order to ensure that they have the power they need without putting a strain on your system. In short, I view the Power Supply in much the same way that I view RAM, it’s always better to have too much and not need it then it is to not have enough and find that you could use more.
Case: DEEPCOOL TESSERACT BF ATX Mid Tower
The case is what most people notice on a computer because it is the part you can see without opening it up.
There are several reasons why I picked this case. The two primary reasons are cost and reviews. I always pay 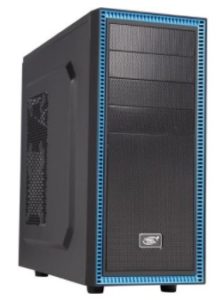 attention to Newegg reviews and if 70% of the people who review it gives it a 4 or 5-star rating I’m sold.
You’ll find that most of these reviews are brutally honest. If they think the case is cheap they will tell you that it’s cheap, but the more experienced builders will tell you if it’s worth the cost. This particular case had 134 reviews and 84% of reviewers gave it 4 or 5 stars. That’s an extremely high rating for a budget case in this price range. I also picked it because it had enough bays for all three hard drives.
What I left out of this build
I didn’t figure in the price of an operating system. This could easily run Microsoft Windows 10 (64 bit) and once it’s installed it would be possible to network this to other computers in your home, that means you could place this in an indiscreet location and not even have a monitor or keyboard connected to it.
Save On Your OS
Because you built this computer yourself it allows you to get the OEM (Original Equipment Manufacturer) version of the operating system at a lower price then the retail version you would get from Walmart or Best Buy, but if you do go that route, here’s two things you need to consider.
If you have any difficulty at all with the Operating System you’ll need to figure it out yourself, which in my opinion isn’t that big of a deal because in all of my years working with Microsoft, very seldom have I ever had an issue with installing the software or felt the need to contact Microsoft to walk me through an issue.

The OEM version of Microsoft locks itself to the serial number on your computer chip and motherboard. This means that if either of these things go bad and needs to be replaced you will need to contact Microsoft and let them know so that they can fix it, otherwise your operating system won’t work any longer. This is done to ensure that you don’t install the OS on multiple computers. The retail version isn’t quite as restrictive, so long as you don’t have the OS installed on multiple computers at the same time you won’t have issues.
You may wish to consider getting Microsoft Home Server. This would allow you to have multiple computers access it so that you could use it for a backup of your photos or documents as well.
You Don’t Have to Marry Windows
If Windows is not your favorite flavor try a Linux based Operating System like Ubuntu. I’ve found this website useful in giving step by step instructions (http://www.havetheknowhow.com/). I use the Ubuntu desktop rather than the Ubuntu server version which permits me to have a GUI (Graphical User Interface). This will simplify many of the steps for new users and the steps are almost identical. Once you have followed the step by step instructions on this website you will be able to access your server on your home network by either an Apple or Windows computer. Use your home computer and you can simply transfer the files over to the server on the network and Plex will see it.
Blu-ray/DVD Burner
I didn’t install a DVD or Bluray player/burner in this Plex Server and the reason was actually pretty simple. I didn’t see a need. The idea behind this build was that if you had a more powerful computer at home then you could copy your movies on it then transfer them to the server. While this could easily rip and compress your videos, it could take a considerable amount of time which would mean that you might not be able to use the server to view your videos. However, upgrading to an Intel i5 7500 would allow you to rip and compress videos at pretty decent pace. Install a DVD burner for under $20 or a Bluray ROM for under $60 and you could easily rip your video collection as well.
At the time of this writing you could order the parts for this build from Newegg for under $500 (without the Operating System) and have a much better system as a Plex Server then what you purchased from Best Buy for around the same amount of money, but if you’re willing do to some serious shopping you could save even more! This gives you ample storage for your videos and still be sufficient to do the job and once the parts have all arrived you can have your system up and running in just a little over an hour with a Window’s operating system and a little more than 2 hours with a Linux based operating system. But more important you will have a sense of joy and accomplishment knowing that you built it yourself and the confidence to fix it or upgrade it to something better suited to your needs if required.
I’ve been using Plex for several years now. Since I started using it I’ve been trying to find out how to make it work the best for the price. Finally, I’ve found some answers. This is one of the best articles I’ve read on building a Plex server. Thanks soooooo much for your insight and detail.
Thanks Devin, I’m glad that it could help you with some of the answers that you’ve been looking for.