
A popular way that people use Plex is to allow friends and family to share media via access to their local servers. When setting up your own Plex Media Server, port forwarding should be done to allow outside access to your server. By setting it up correctly, you can access all your media from anywhere you have a data or wifi connection to the internet.
Why Set Up Port Forwarding
Different types of traffic will require a specific port to drive in and out of your local network. Think of your internet as a highway, and the ports are different lanes. To get the proper Plex traffic in and out of your network, you will need to set up port forwarding on your router pointing to your server.
While each modem/router manufacturer will have a different interface and style, the basics are the same. You will need to know four things:
- Your router’s IP address
- Your plex server address
- Which port your server is listening to
- Do you have a router and modem combo or do you have a separate Router and Modem?
Sharing Plex without port forwarding
Plex, by default, will set up the port as 32400 and will require it to be forwarded through your router to the destination (in this case, your Plex server). You can manually choose another unused port, but that is unnecessary for the majority of users. Keeping default port set at 32400 is perfectly acceptable and easier.
The easiest way to find your server’s IP address is to use Plex itself.
On a computer, launch the Plex app or the web-based app
Sign in to your Plex account and choose the server you wish to provide access to
1. Click on the settings icon in the upper left-hand corner
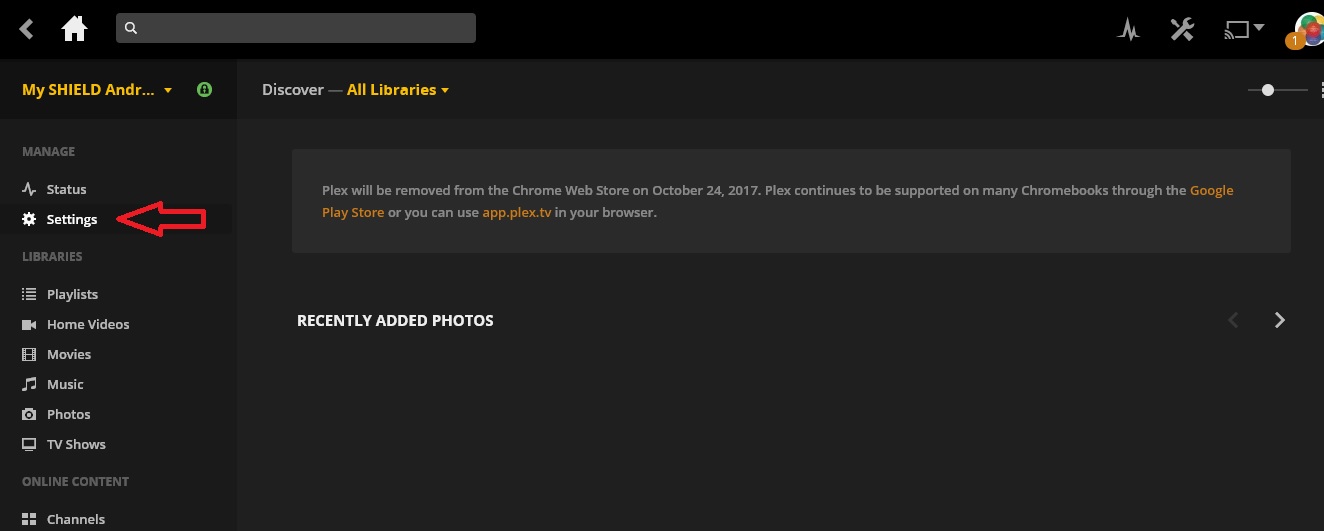
2. Click the server tab.
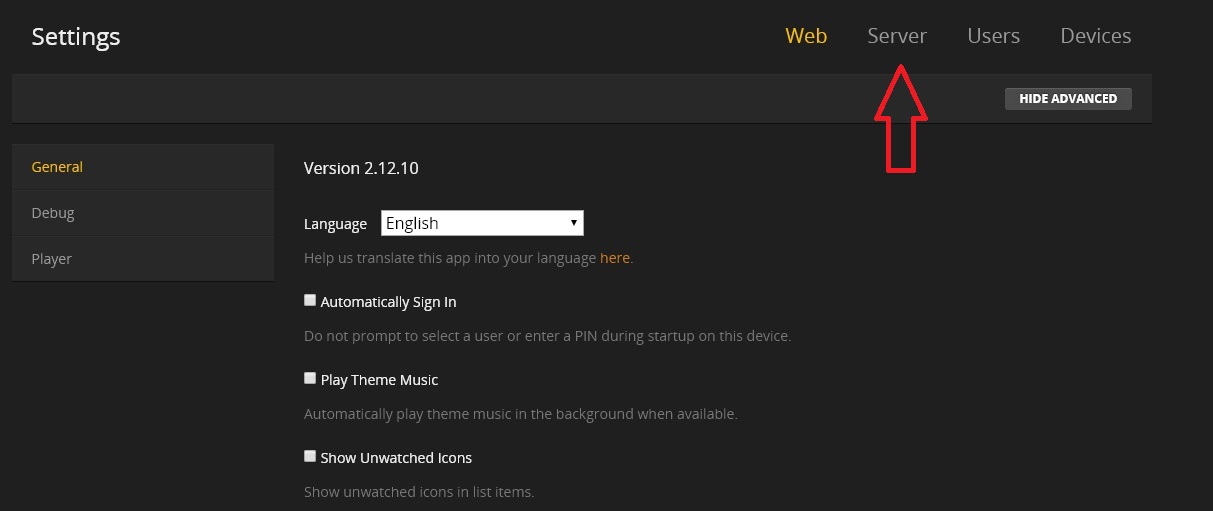
3. The second tab down on the left will have ‘Remote Access’ listed Click on it
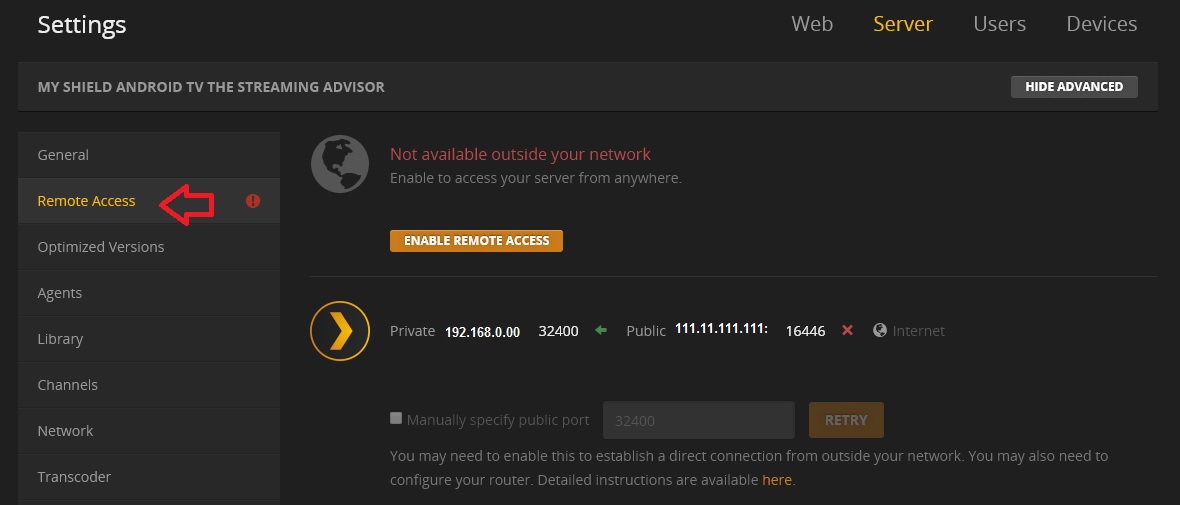
4. This will show you both the server’s local IP address as well as your WAN IP (what shows to the outside world as your ‘home’ IP address). Write these numbers down for future reference. (note the numbers in our pic are fake)
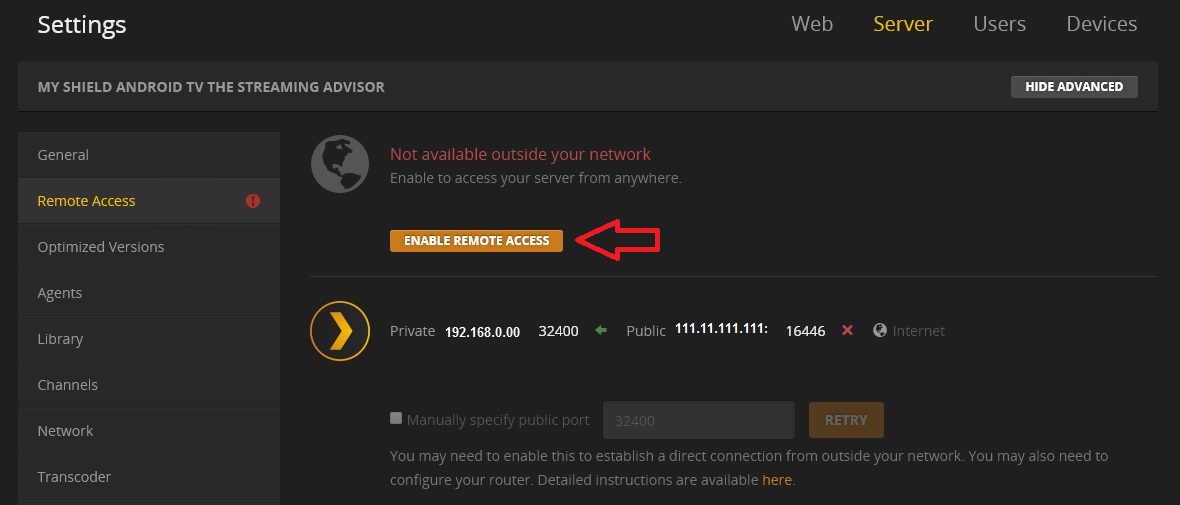
5. Click the orange Enable Remote Access button
Xfinity internet will have your router/modem set as 10.0.0.1 designation. AT&T most likely has as 192.168.1.254. Verizon Fios will usually have it at 192.168.0.1. If you do not know what your gateway IP is for the router, you may need to contact your ISP. Otherwise, your ISPs website is the best resource to use.
Once you are able to acquire the router’s gateway IP, open a browser and type that address into the address bar. It will take you to the router’s login page. Again, your ISP is the best resource to obtain that username and password. The password combination can differ from device to device, even if they are provided from the same ISP.
Configuring Router Settings
1. Log into the router.
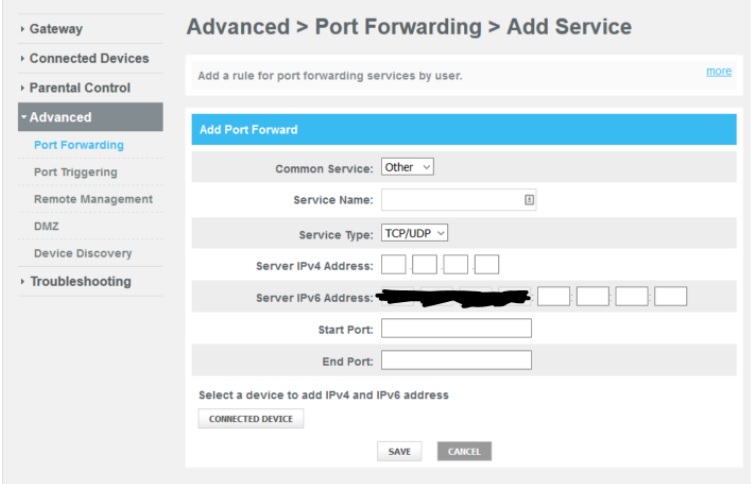
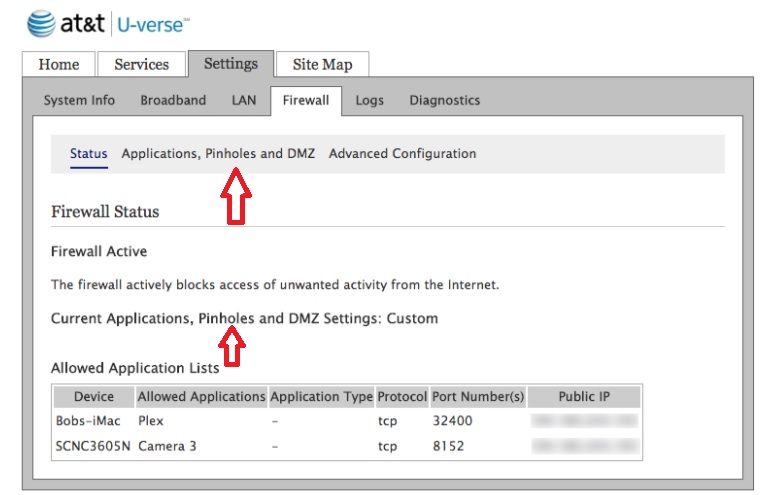
2. At this point, look for a tab for ‘advanced settings’. This is where you can look on nearly all routers for the port forwarding settings (AT&T calls it ‘pinhole’ – just to be more confusing).
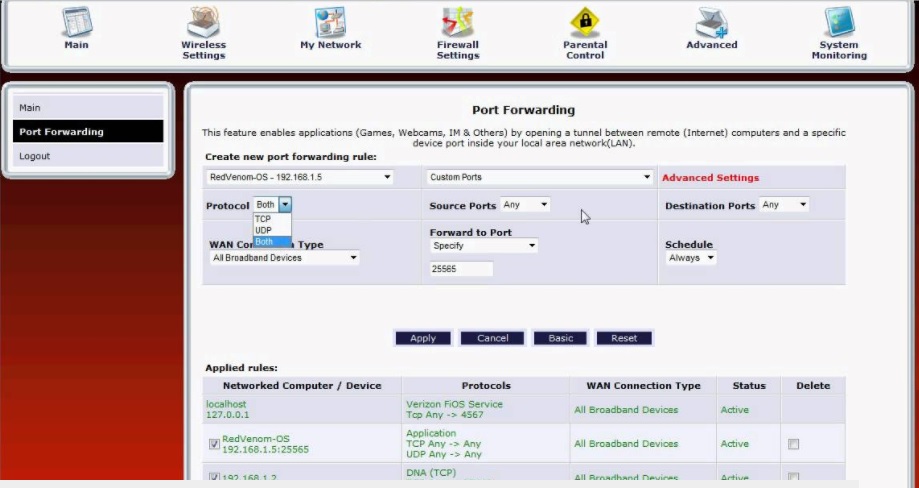
3. Under both the ‘private range’ and ‘public range’ put the Plex port needed – again, 32400 by default.
4. Choose TCP as the option. Name it Plex or whatever unique name you wish.
5. Place the Private IP address for the server in the section marked private/server/destination (found above on the plex remote access section in settings).
6. Once all that has been entered correctly, save these settings.
See Photos below for examples of configuration pages.
Xfinity
AT&T
Verizon
Once you have finished working on your router settings you will need to go back to your Plex settings
First off, you should now see that the remote access tab is marked with a green checkmark. If not, retest your remote access and try again by refreshing the remote access.
Computers usually hate us, so sometimes its necessary to click retest several times before it will present that checkmark. Show your computer who is boss – click it a few times if necessary. If it still doesn’t turn green after 3 or 4 attempts, go back into the router settings and double check all your work. Make sure that your computer’s IP is entered correctly, TCP only is enabled, and that port 32400 is listed.
Some local networks will have a modem as well as a separate router. If this is the case you will have to look up your routers address and Modem’s address separately and adjust the setting accordingly. Afterwards, you will need to daisy chain the port forward. For port forwarding directions go to https://portforward.com/ where they list all of the routers.
Port forward as shown above on the modem to the IP of your router. Then, do the same to the router – port forward from there to the Plex Media Server Essentially, you will create a path from the modem to the router to your plex. Like a breadcrumb trail to allow the data to be led out and back into your server.
Best Practices
Set your device up as ‘reserved’ on your modem or router, or set your server to a static number which will not change. This method will keep the flow of information to the server even if there is a power outage, reboot, or your computer just flat out wants to make your life miserable. If your Plex Media Server is not set as the same IP day in and day out, the local address may change. This means you would have to set up the whole forwarding scheme back up again to the newly acquired IP address.
To see if all of this is set up properly, it is usually best to try from a remote or different internet connection. If you have the Plex client app installed on a phone then it’s simple. Disconnect from your home wifi, use the data plan. Try to log into plex.tv and launch the server. If you do not have the app, just open up the smartphone’s browser, log into plex.tv website and click on launch. If you do not have a smartphone handy, have a friend or family member you share with try to log into the server.