
Here’s a step by step guide on using handbrake for compressing videos for your Plex Server and using the version of Handbrake for Microsoft Windows. If you are using a different operating system, the look may have some variance. This tutorial is based on settings for Roku so your settings deviate a bit. This is intended to be more of a guide then it is a step by step for everyone.
Download Handbrake Here
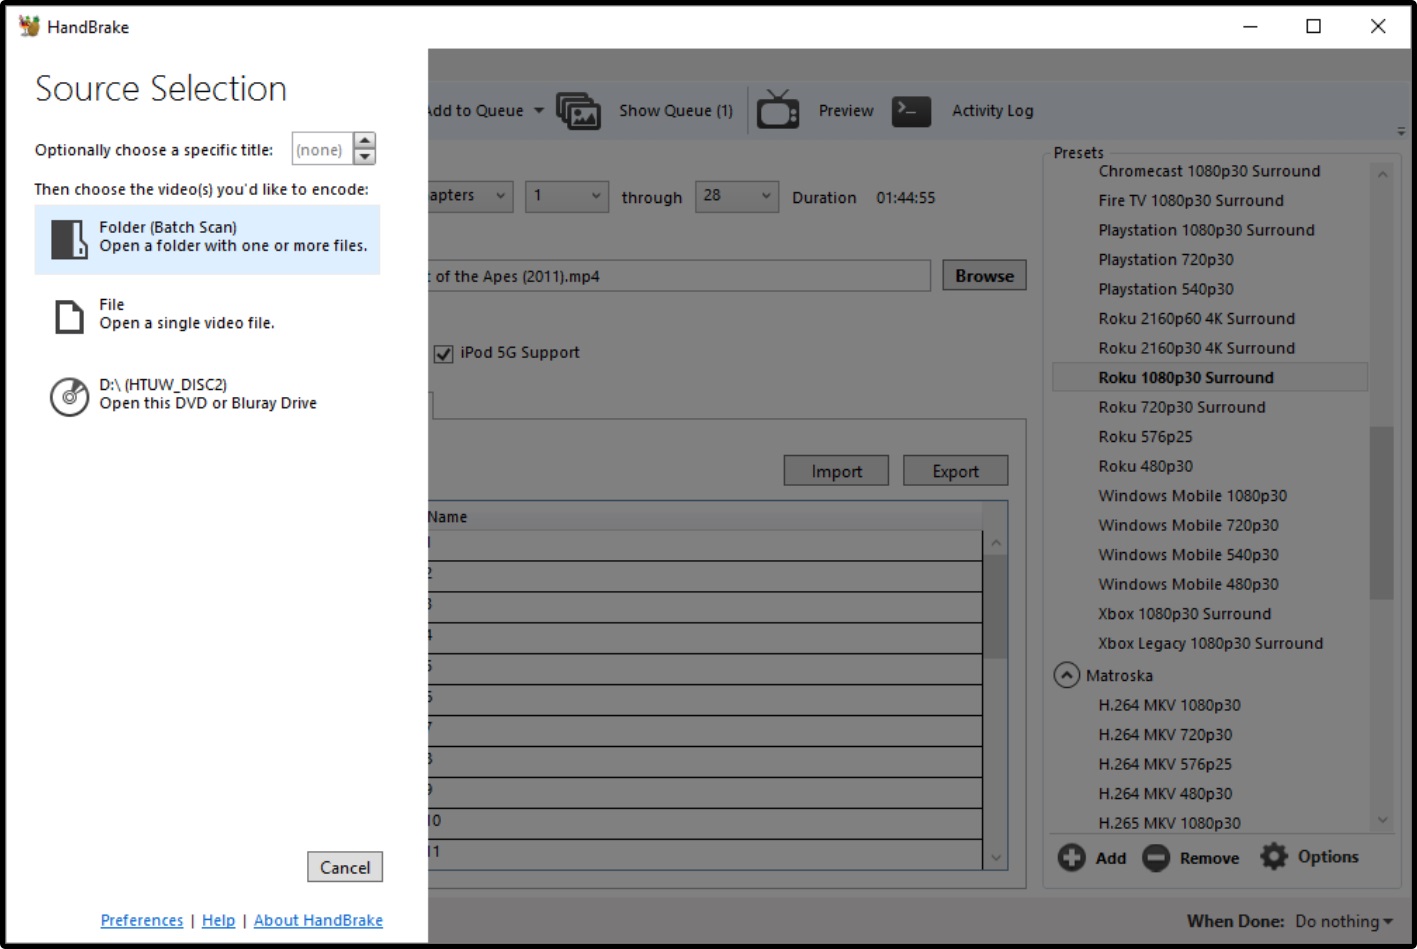
Step 1 – Select your source type.
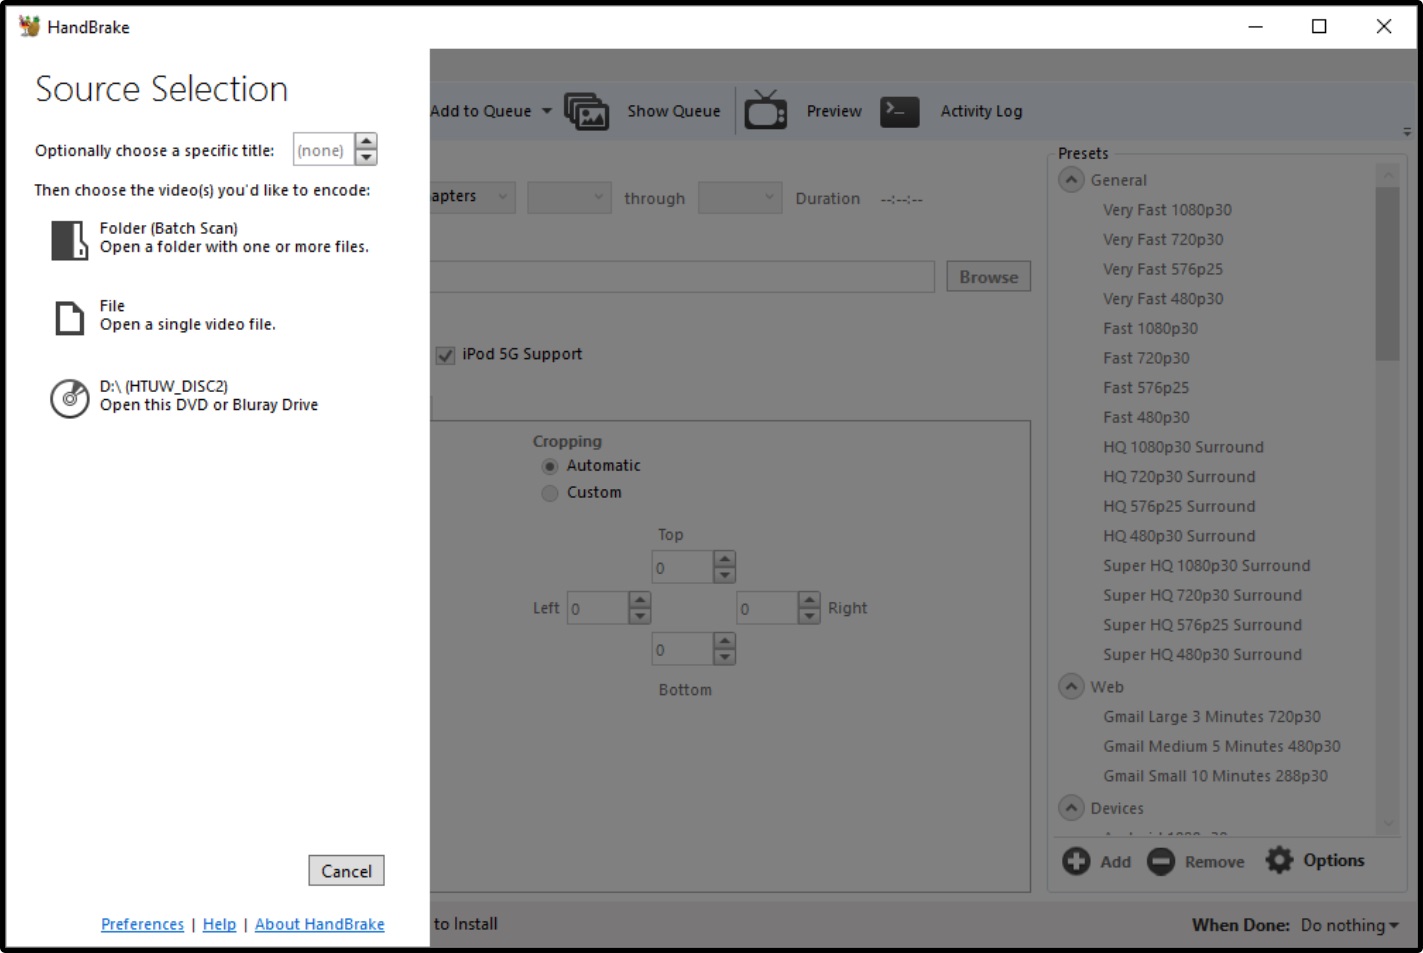
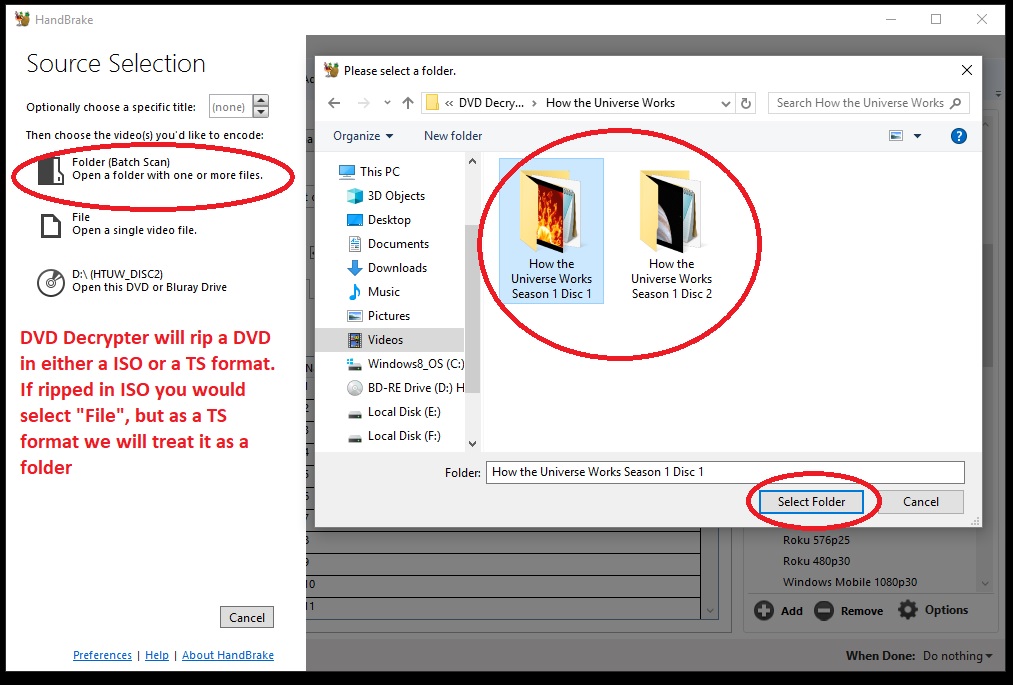
Some versions of Handbrake do not have this step. You can either select a single file (such as the video ripped using MakeMKV) or from a folder (such as when we used DVD Decrypter)
Step 2 – Select the video you wish to compress
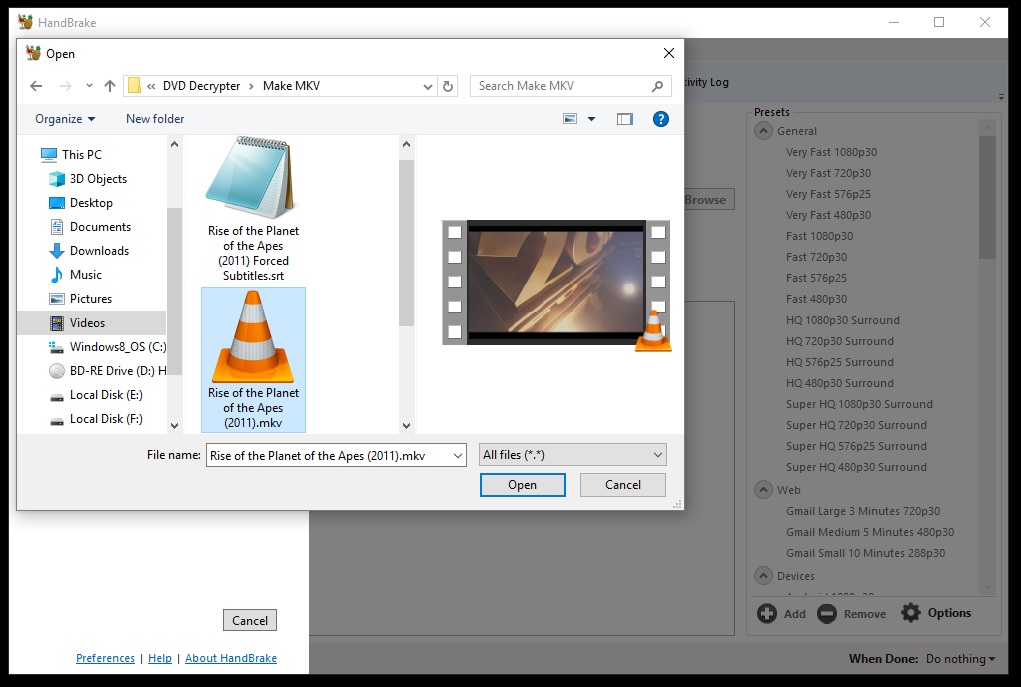
Selecting a single file as your source.
Step 3 – If available, select the appropriate device you plan on streaming videos to.

My source is a Bluray rip at 1080p quality and it will be primarily watched on my Roku, your selection may vary.
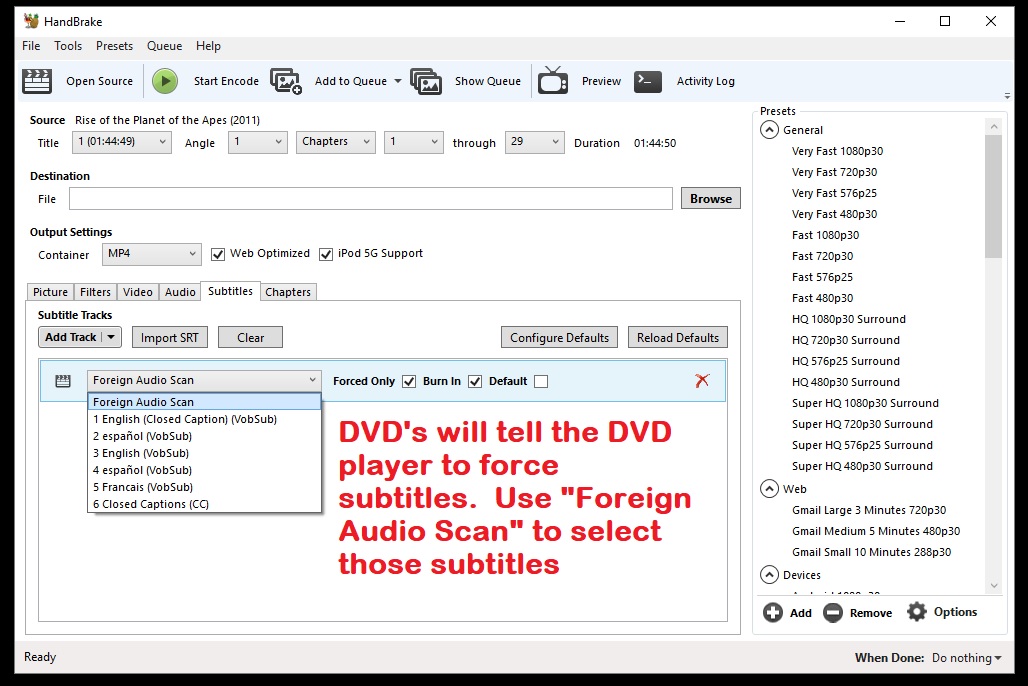
Step 4 – Don’t forget Subtitles!
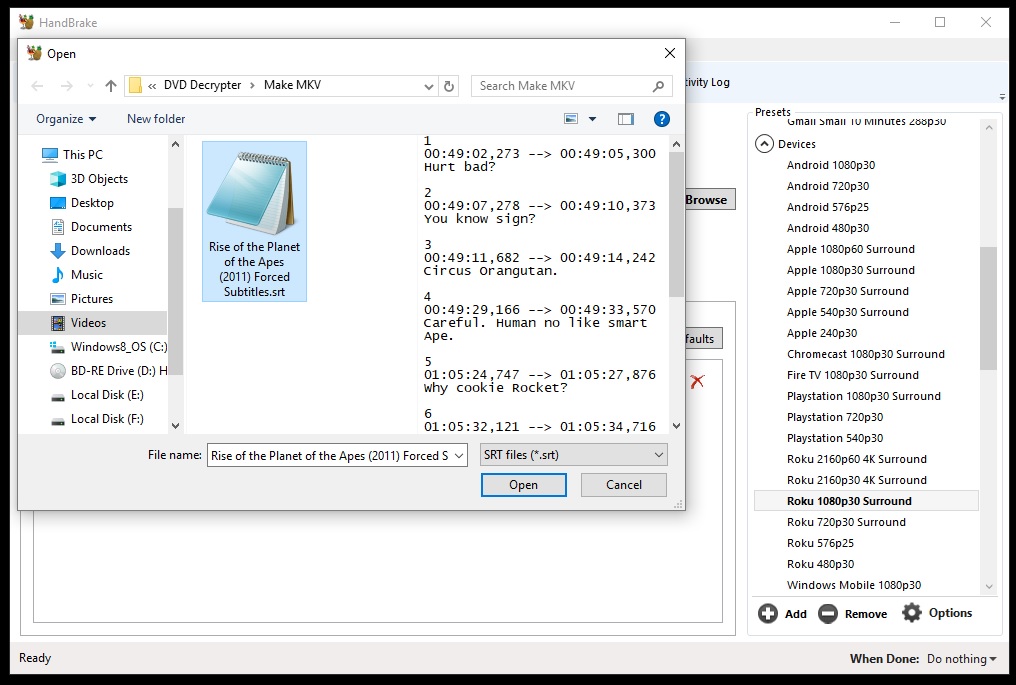
I will often rip forced subtitles from the DVD and save as an srt file. You can add them to the video by selecting “Import SRT”
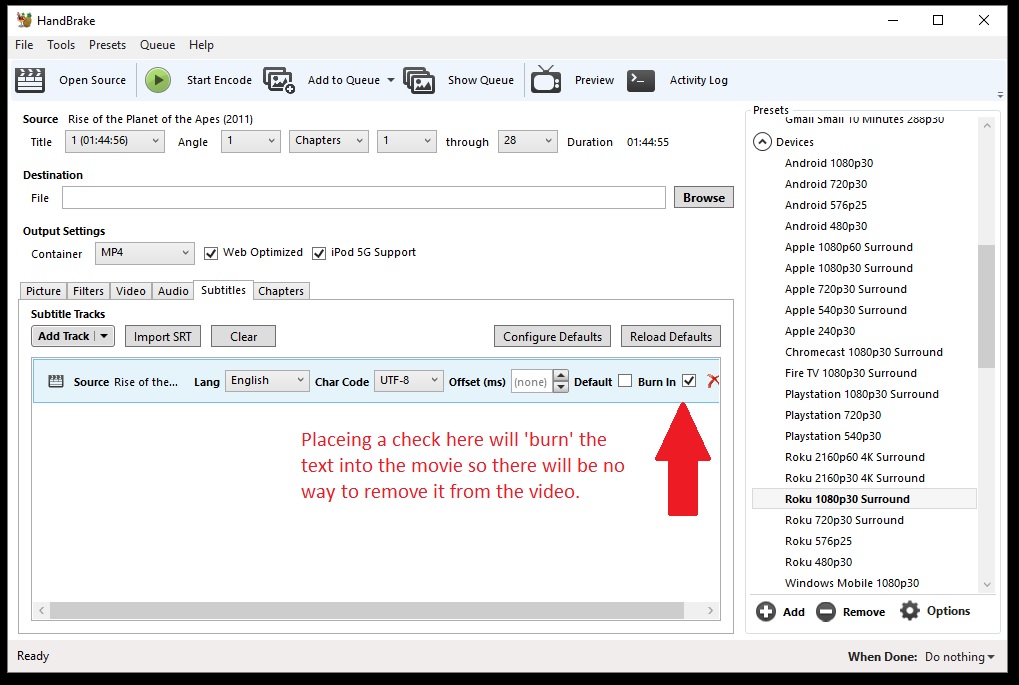
Once selected, check the box “Burn in”. This will ‘burn’ the text into the video so it will always be there. If you are ripping a DVD you can select “Add Track”. This will give you a drop-down menu of all the available subtitle tracks on your DVD. Select “Foreign Audio Scan” and put a check mark in the ‘Forced Only’ and ‘Burn In’ boxes. This tells Handbrake to search the movie for times when the DVD forces the DVD player to show subtitles.

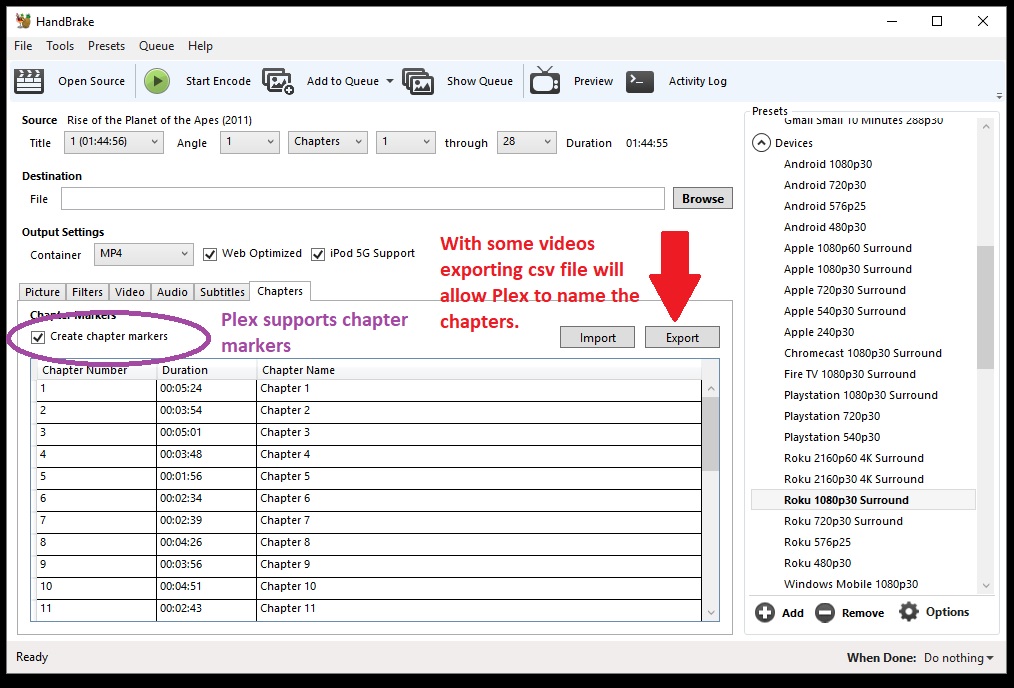
Step 5 – Chapters and destination location
Plex supports chapters in your video if you include them.
Plex does support chapter markers. You have the option of telling Handbrake to encode the video so that they include the chapters. How you pick the chapters varies from device to device. You also have the ability to extract these chapters in a csv file which will allow Plex to label the chapters with the same names they have on the DVD. Provided it can find the info on the internet.
Choose your destination location by clicking on the ‘Browse’ button.
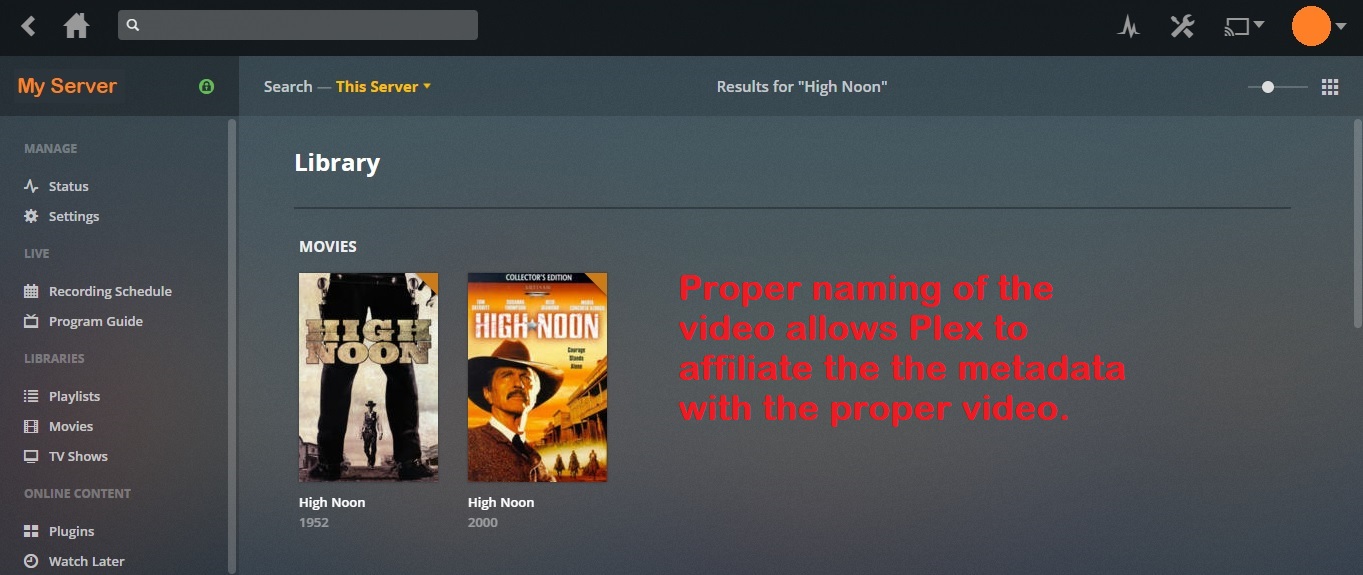
Step 6 – Naming your video
Once you have chosen the location to save your video, properly name it so that Plex will be able to locate the metadata on the web. For movies, the format is:
Name of the Movie (year of release)
Rise of the Planet of the Apes (2011)
Dawn of the Planet of the Apes (2014)
TV and direct to video movies are treated the same way as theatrical releases. Including the year of release will help Plex know which version you are including in your server. For example in 1952 the classic movie High Noon with Gary Cooper was released in the theaters, in 2000 TBS did a remake with Tom Skerritt.
High Noon (1952).mp4
High Noon (2000).mp4
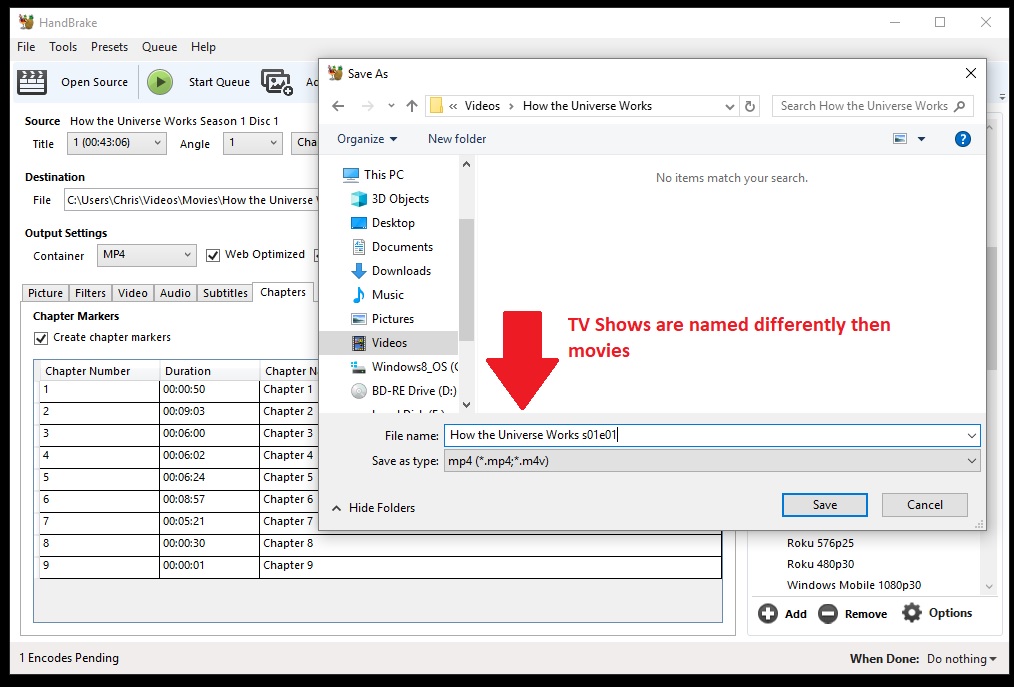
TV Shows will need to be named slightly differently.
Name of TV Series season and episode of that season – Title of episode (optional)
How the Universe Works s01e01 – Big Bang
Specials are season 0
The Six Million Dollar Man s00e01 – Cyborg
The Six Million Dollar Man s00e07 – Bionic Ever After
You can also name TV shows based on the airdate.
The TVDB is an excellent resource to help you in naming your TV episodes.
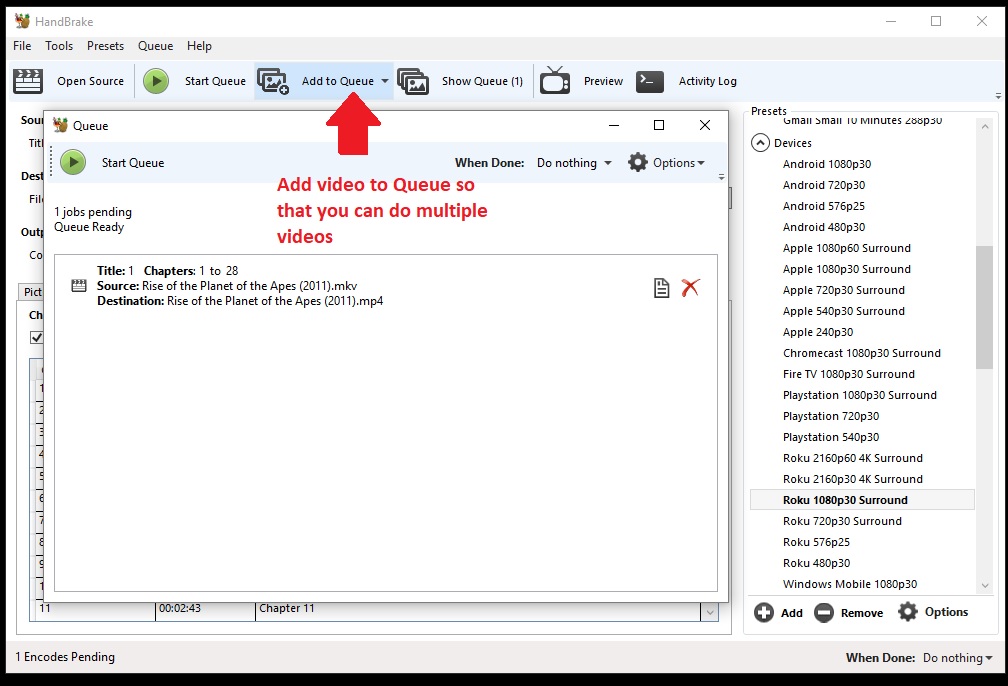
Step 7 – Create a ‘Que’.
One of the advantages of Handbrake is the ability for you to choose several videos to compress and just walk away. So set up a Que prior to going to bed and when you wake up in the morning you can binge watch your favorite TV series on Plex! After completing the previous steps click on the add to Que. In the “Show Que” box you will see how many videos you have Qued up.
To add more videos, select the source you wish to use by clicking “Open Source”, which will bring you right back step one.
For this example, we are going to use the DVD we ripped using DVD Decrypter
In the Title Bar, you will have a drop-down menu,
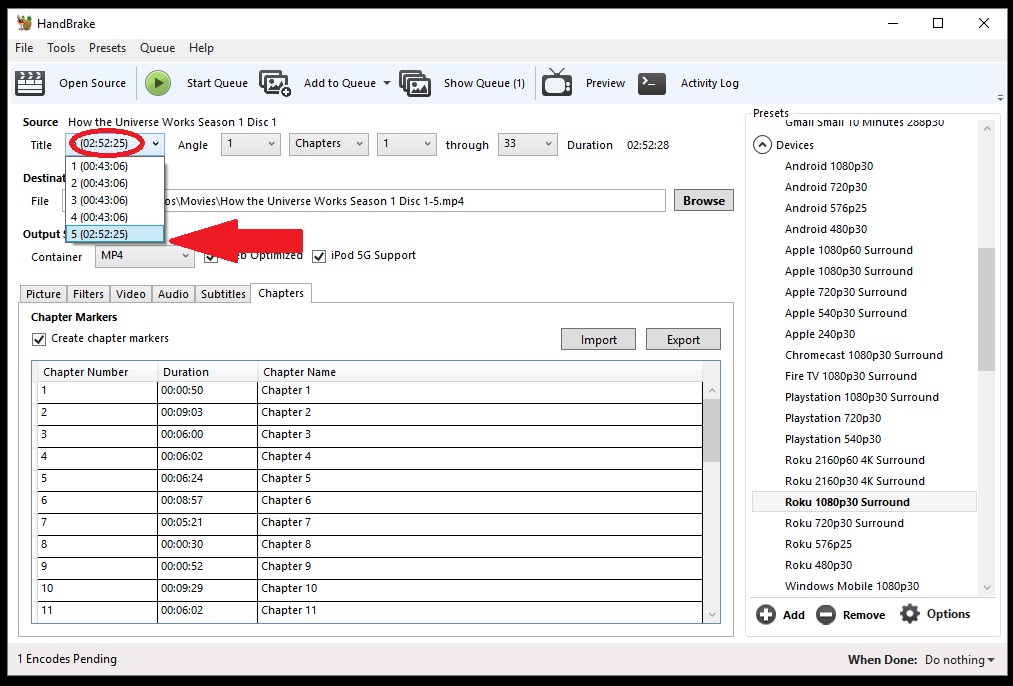
Handbrake will always select the longest video by default. For TV programs you will often see one very long video and several smaller videos. On some DVD’s you are given the option to watch all of the episodes. This is often one large video file, rip all of the shorter videos. As a general rule, a half hour (sitcom) is about 20 to 25 minutes, giving five to 10 minutes for advertising during a broadcast, an hour-long program will be roughly 40 to 50 minutes giving broadcasters 10 to 20 minutes for advertising.

Tell Handbrake where to send the finished video to remembering to properly name it in accordance with the rules stated above
After confirming all of the previous steps are completed for the selected video add it to the Que. Once you have performed each step select the “Show Que” and you will get a dialogue box showing each video in your Que. Once you have everything in order, press start.
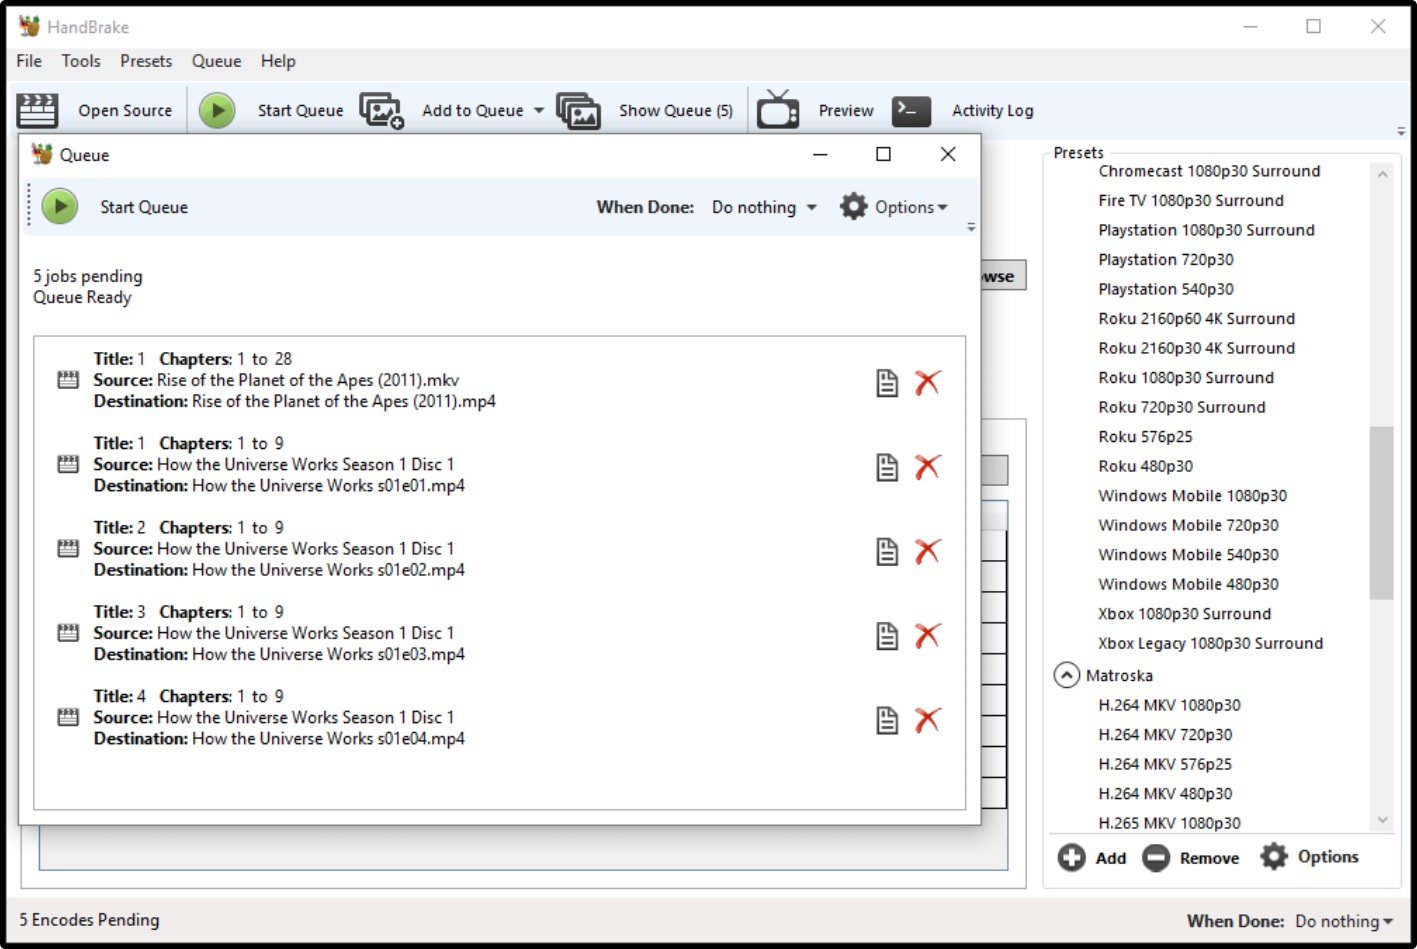
Each time a video is complete will see a green checkmark next to the video.
*note – you can change the Que order by dragging each one higher or lower on the list using your mouse.
Step 8 – Check your videos to ensure that they are where you instructed them to go.